Showing posts with label meat. Show all posts

Saturday, May 21, 2011

3 of the best things in life...Combined

  It has occurred to me that making charcuterie may just be slowly evolving from interest to obsession. I often find myself fantasizing about grinding pork and smoking large quantities of meat, and scheduling days off not for socializing or relaxing but for experimenting with lard and hog casings in the kitchen. The more I dabble in the homemade, the more addicting it becomes. The only things I need now are a few pigs to raise and a bigger meat grinder.
  Lately, everything has been about sausage. The combinations and flavors one can make are endless. While bacon is a divine creation, it is not nearly so varied in styles. So what happens when a beer drinking cheese monger starts crafting sausages? Well, you get a Cheddar Beer Sausage. A power trio of superior foods. I refrained from adding any bacon (the 4th super food) to the mix for fear I might marry it.


Dinner
The makings of a very good night


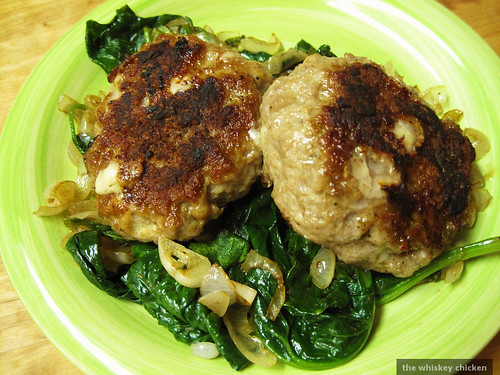
   This sausage is a bulk fresh sausage like the others I have made so far, but half is destined to become links after this weekend. I kept the seasonings fairly simple so the cheese and beer could shine through, just a hint of caraway and red pepper. I used an English farmhouse cheddar and an awesome smoked Marzen as the main ingredients. And just so I wouldn't feel completely ridiculous about having sausage and beer for dinner, I threw in a little spinach and spring onions as a green bed for the tender patties to rest on.


Cheddar Beer Sausage

  I can think of a certain Mr. Dean who can take a hike.


Sunday, May 15, 2011

CharcutePalooza: The Grinding


Sausage's partner in crime
Good Morning


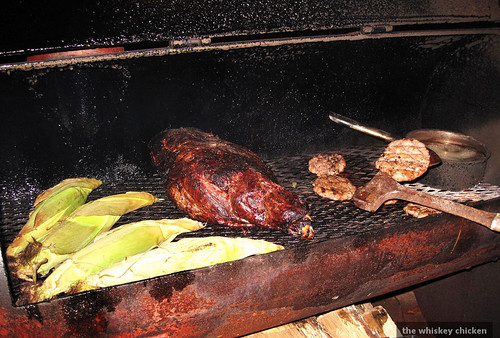
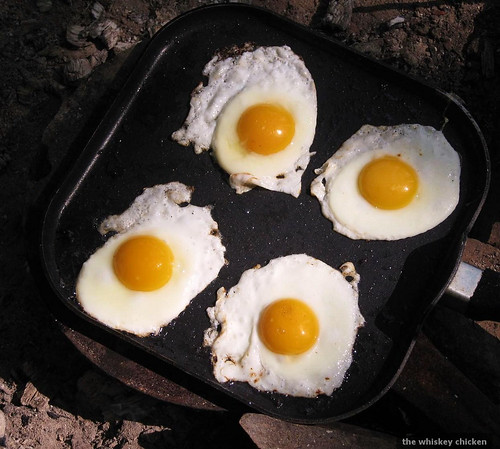
  Oh the shame! It has been nearly one month since my last post! While I could say that my distractions have consisted of only work and chores, I did manage to sneak in a tiny bit of downtime. A short weekend in the North Georgia mountains can do wonders for the soul. Just look at those wonderful fresh eggs! Those on some crisp toast, a cold beer, and a babbling brook equal the perfect morning (What...you don't drink beer in the morning?).
  Yet one cannot live on beer eggs alone, at least I can't. So, I figured this would be as good a time as any to debut some homemade sausage. Before this challenge, I had never once attempted something as seemingly complicated as ground sausage. The funny things is, once you try it, you feel like a fool for thinking it would ever be hard. I can see how that way of thinking could hold anyone back from handmade cooking. But I can honestly say I have not had that much fun making food in the kitchen at midnight by myself before.
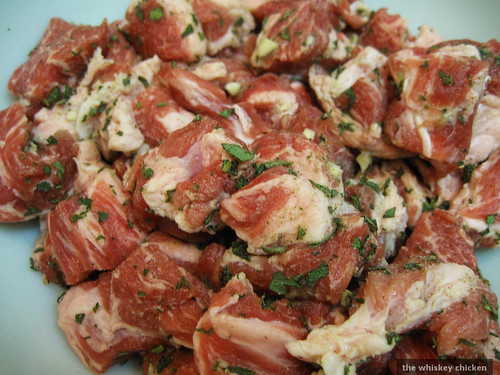
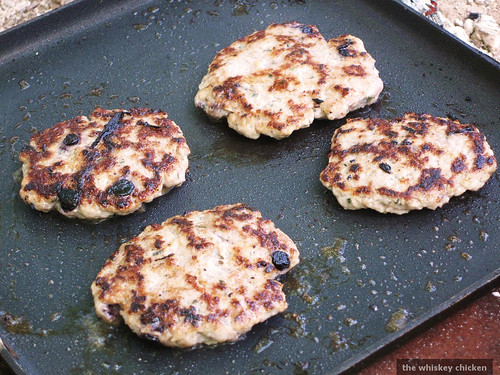
  I decided to take up both challenges and make breakfast sausage and Chorizo. I am very glad I did. I was also surprised to find that fresh sausage was easier than some of the previous tasks of this Year of Meat. It simply consisted of a fresh pork shoulder beautifully marbled with fat, diced and seasoned, thoroughly chilled, and then ground. For the breakfast sausage I added sage, lots of fresh garlic, and dried blueberries. The Chorizo included many different dried chilies, garlic, oregano, and tequila.


Soon to be Sausage
Ready for grinding


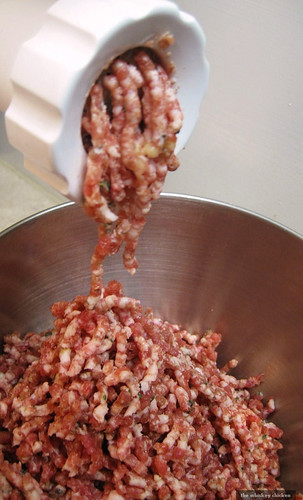
  The diced meat was then chilled very well, and ground using my new and magical Kitchenaid grinding attachment. It ground quickly and efficiently. So efficiently in fact, that I barely had time to snap a photo. And that was all there was too it. To make links, I could have stuffed the fresh sausage into casings, but this was strictly to test the water, nothing more. I made both sausages the night before leaving for the camping trip.


Grinding


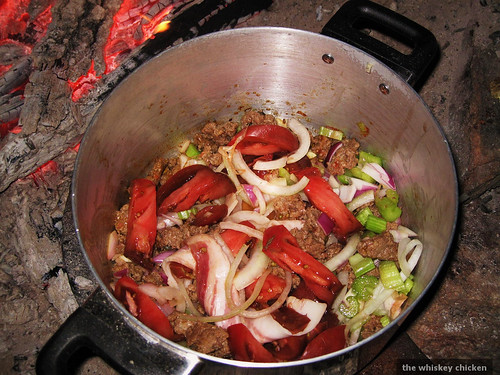
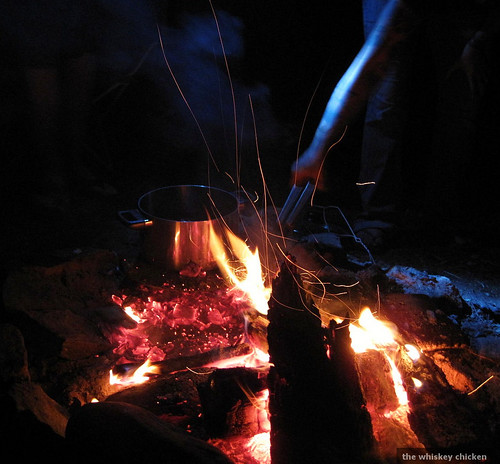
After a night of rum and allergies, nothing was more satisfying than blueberry sausage, toast, and eggs. The Chorizo was reserved for a late night concoction of sausage, onions, garlic, celery, tomatoes, and rice stewed together into a rich improv gruel.


Blueberry Breakfast Sausage
Cure for the common hangover


Chorizo and veggies
Meal prior to common hangover


  Before now, I had not given much thought nor appreciation to sausage, as I have always been a bacon freak. But having experienced the joy in making it, as well as the comfort in consuming it, sausage has certainly been elevated to new heights in my book, and I cannot wait to construct my next grind.


campfire cooking


Monday, April 18, 2011

CharcutePalooza: The Tasso of the Ham

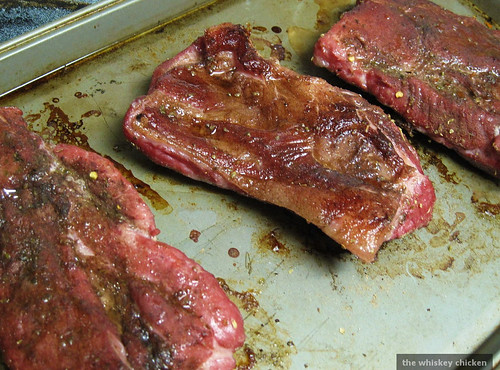
Tasso Hams
Tasso Hams


  Well, I'm a little late getting to this, but nevertheless I finally got around to making tasso ham. Now I feel real embarrassed admitting this, being one who spends every day of my life around cheese and charcuterie, but I didn't know what tasso ham was. But that is the beauty of this challenge, to learn about new ingredients, new cooking methods, and new skills.
  So then tasso ham is not really even ham, but pork shoulder that has been cured, rubbed in a spicy aromatic blend of white pepper, marjoram (although I actually used oregano), allspice, and cayenne, then smoked. It isn't meant to be eaten as a main dish (or so they say), but instead used as a seasoning for just about anything you can think of. It is most commonly used in Cajun cooking for jambalaya and gumbo. It is also ridiculously easy to make. It cured in less than 4 hours, and was done smoking in less time than that. By far the easiest of the challenges as of yet.
  Ok, ham lesson over. Since I haven't really had the time lately to use this meaty condiment for things like gumbo or beans or any dish that takes hours to prepare, I turned to my ever trusty standby. Breakfast, it's the most tasty important meal of the day.
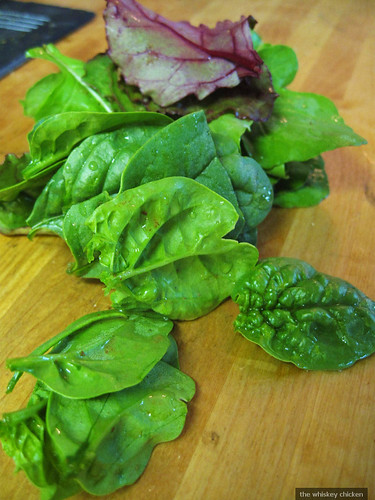
  I did nothing more than crisp up a little bit of the ham with a handful of lovely greens from the garden and a couple of eggs from the coop. In cooking, simple is rarely boring.


Homegrown Greens
Spinach, Arugula, & Beet Greens


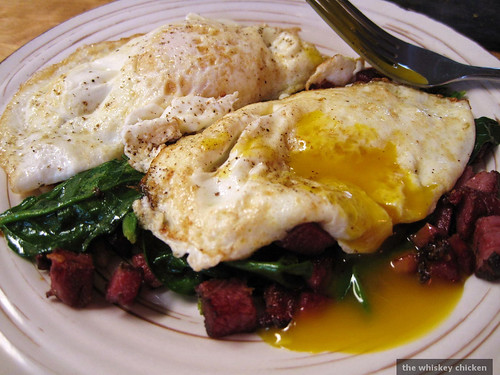
  Sauteed Greens with Tasso Ham & Fried Eggs


  Ingredients

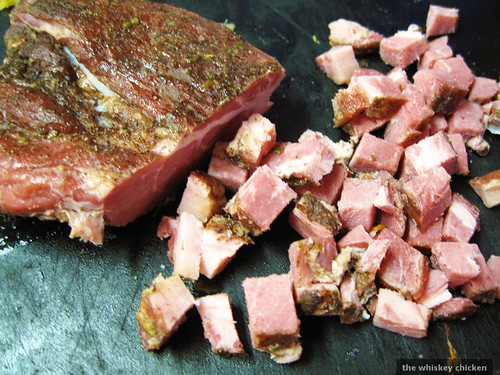
  2 ounces Tasso Ham, cubed
  1 garlic clove, minced
  1 large handful greens (I used spinach, arugula, and red beet greens, but you can use whatever you want)
  2 eggs
  butter
  salt & pepper


Tasso Ham
cubed & ready for action


  Add ham to pan and crisp, about 5 minutes.
  Add garlic, saute for 30 seconds.
  Throw in greens, season, and cook until wilted, set aside.
  Lightly butter pan, add eggs, and season with salt and pepper. Cook to whatever doneness you like.
  Top greens with eggs, serve.


Breakfast
Breakfast is served

Tuesday, February 15, 2011

CharcutePalooza: Pancetta...Conquered

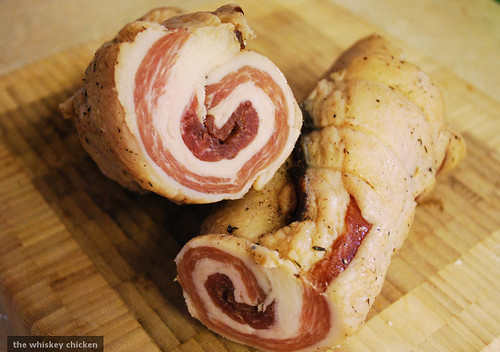
   It appears that all of my pancetta rolling frustrations paid off in the end. Today I cut my pancetta down from its' gallows and further inspected it. No mold, slightly dry on the outside but still pliable, smelled tasty. All good signs. After freeing it from its' (bad) truss, I cut it straight through the middle. Beautiful! My crazed rolling attempts did pay off.


Finished Pancetta
swirly pork


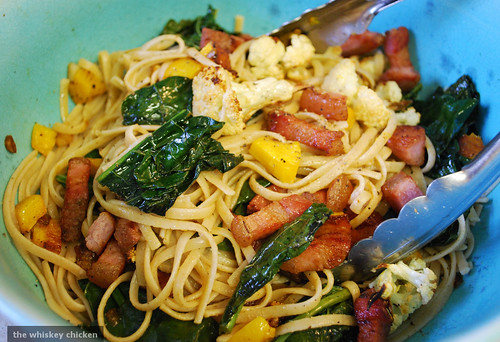
   But one cannot judge a meat on good looks alone, I needed to know how it tasted. After having consumed a good deal of bacon on its' own, I figured I should incorporate this cured meat into some sort of recipe. After picking up a gorgeous bunch of kale on impulse and taking inventory of ingredients on hand, a lovely pasta dish seemed only right. Never mind it was for breakfast. Pancetta is pretty much bacon anyway.
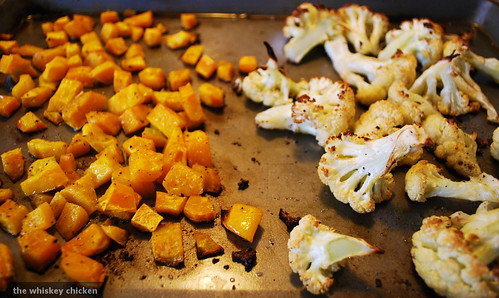
   I used a whole wheat spaghetti for its' nutty flavor, but any pasta will do. There really isn't any sauce, allowing the pancetta to shine through instead. The earthy bitterness of both cauliflower and kale compliment the pancetta, while sweet squash contrasts it. You could just as easily use bright ingredients like fresh peas, artichokes, or asparagus for a springtime twist.


Roasted Vegetables


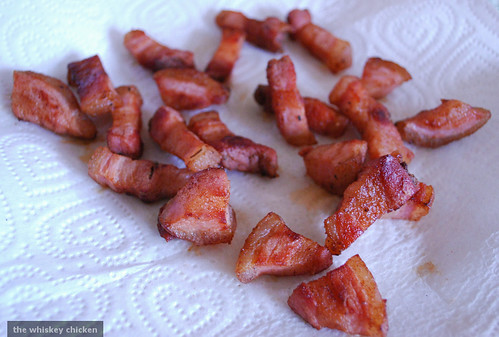
Pancetta


Roasted Cauliflower, Buttercup Squash, & Kale Spaghetti with Pancetta


Ingredients

1/2 lb. whole wheat spaghetti
1 small cauliflower head, divided into florets
1 buttercup squash, peeled and chopped
3 1/2 inch thick slices pancetta, cubed
1/2 small onion, minced
2 cloves garlic, minced
1 bunch kale, rough chopped
1/4 c chicken or beef stock
salt & pepper


Boil spaghetti in salted water until "al dente". Drain and toss with olive oil.
Roast cauliflower and squash in a 400 degree oven until crispy and browned (about 30 minutes).
Saute pancetta in large pan until also crispy and browned (About 8 minutes). Remove and drain on paper towels.
Add onions to pan and cook until tender (4 minutes). Add garlic and cook for 30 seconds. Add kale and toss. Add stock and cover. Cook for 6 minutes. Remove from heat.
Toss vegetables with pasta, season with salt and pepper.
Top with pancetta.


Pasta
Breakfast


   I think the greatest lesson I am learning from all of these meaty DIY projects thus far is how special food traditions really are. It is so easy to order meat from the deli (well, other than the waiting part) and not give another thought to it. But when you take the time and effort to cure a piece of pork and watch it transform into something as identifiable and truly iconic as bacon, it really makes you stand back and appreciate the skill those before us had to not only survive on what they made, but make it so delicious too. I feel humbled by the craft I am learning.

Sunday, February 13, 2011

CharcutePalooza: Glory be to Bacon


Oh Bacon!


   CharcutePalooza, you have been so good to me. I cannot stress enough how glorious homemade bacon is. Even foregoing the smoking step of the process, my bacon turned out salty, sweet, and heavenly. It fries up quickly in the pan without shrinking into nothingness, and has a delightful crispy chew. It therefore boggles my mind that more people don't try this easy cure at home.
   The beautiful thing about making your own is that you have complete control over what goes into it, how it's flavored, and also how it is cut. My biggest complaint about grocery store bacon (besides the price) is how terribly thin it is. I'm not looking to eat bacon flavored paper, I want something I can sink my teeth into. Speaking of price, to make a 3lb. slab of bacon, all of my ingredients cost me under $12 (local farm-raised pork included). Now that I know how easy it is to make, I will never buy bacon from the store again. And thank the stars, when the Zombie Apocalypse comes, I will not be without the good stuff.


Bacon!


   What have I been doing with all of this tasty meat? Well, I admit I haven't been too creative in the bacon cooking department. I do realize that there is a vast array of different applications for such a lovely and versatile food. I could be flavoring stews and beans, or wrapping all sorts of cuts of meat, maybe even candying it for a Bloody Mary perhaps (Ok, that is totally on the list). But really, I've just been eating it with eggs for breakfast. I love all ways in which bacon can be prepared, but now that my hens are churning out small mountains of eggs each day, how could I possibly resist home cured bacon with freshly laid eggs straight from the backyard?
   I did, however, try a slightly new variation on the eggs and bacon dish this morning. After an exceptionally crappy week (yes, I am sick, again), I thought maybe something warming and hearty would help heal my tired germy soul. And it is so easy to throw together that excuses such as sickness, hangovers, or sleepy Sunday mornings don't apply here.


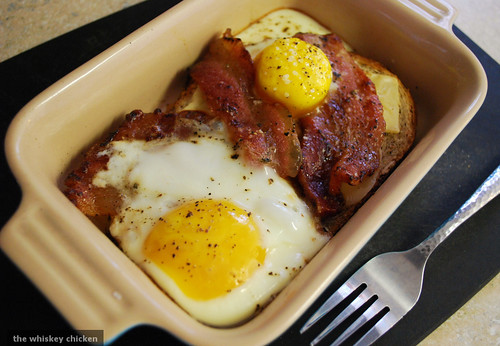
Baked Eggs with Bacon


Ingredients

1 thick slice of rustic bread
2 slices bacon
1 slice sharp cheddar cheese (Try Seaside, Cabot Black wax, or Tillamook)
2 eggs
salt & pepper

Preheat oven to 350 degrees.
Fry bacon over medium heat in skillet, drain on paper towels.
Brush a small amount of bacon grease onto bottom of a small ramekin or baking dish.
Add bread slice, top with cheese, layer on bacon, and crack eggs on top (It is ok if eggs slide off, the parts that touch the sides of the dish get extra crispy and delicious).
Sprinkle with salt and pepper to taste.
Bake anywhere from 12-16 minutes, depending on how you like your eggs (If you like your eggs cooked hard, you can break the yolks before you bake them).


This recipe is as equally easy to make for a crowd as it is for one person. You can layer all of your ingredients into a large casserole dish if you are making this for several people.


Baked Eggs

Tuesday, February 8, 2011

A good day for a Hog Killin'

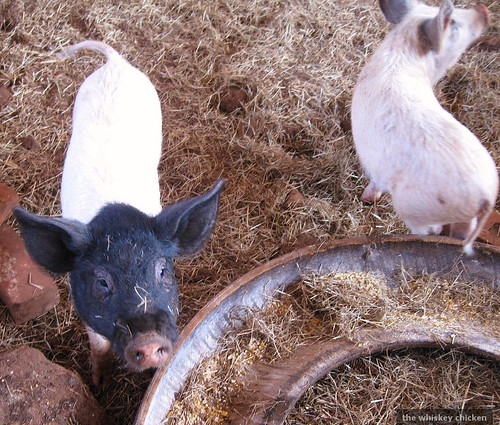
little piggies
No, not these guys


   So, the other day I attended my very first hog killin'. And yes, it must be referred to as a "killin'". Not a butchering, not a slaughtering, not even a processing. That's just the way it is in the South. I imagine that very few people would ever have any desire to ever attend a hog killin', but I have been toying around with the idea of raising pigs for quite some time now, due mainly to my immense love of all things cured and made from pork, and was curious about the process.
   When I first entertained the idea of butchering my own chickens, I wasn't sure what to expect. As the chicks grew older, I never felt any real attachment to them, admiration and amusement for sure, but pets they did not become for me. So when the big day came, it was surprisingly easy. Now, killing anything should never be enjoyable, but after the kill was made it was smooth sailing. However, a pig is a bit different from a bird. And granted the hogs I would be watching were not my own, I felt it would give me a good idea of what to expect. Not to mention there would be a lot of food involved!
   The big event was held early in the morning down in a tiny little town called Woodland at the obscure Old South Farm Museum, which turned out to be a really neat place filled with all sorts of farming and food relics. I was shocked and a little inspired by the turn out, maybe 100 or so people total. My morning haziness quickly wore off in the midst of so much anxious anticipation, plus it was just damn cold. The instructor was a professor who specialized in meat science, which I had never heard of.
   The killing itself (first of two that day), went off without a hitch. The hog was shot in the head, immediately thereafter he was stuck with a knife in the jugular and allowed to bleed out quickly in the cold air. From there he was scalded with hot water and scraped of his white hair. Then strung up, gutted, beheaded, and divided into primal cuts.
   Witnessing the event gave me a much better understanding of what to expect and how one could feasibly do the same at home. It also eased my mind a little to know that the process was so quick, humane, and painless. Lastly, I felt I had respected and honored not just those particular animals, but every pig that I consume by not turning my face and hiding, but instead facing it's death and thanking it for what it provides me.
   The rest of the day was filled with nonstop demonstrations and classes on a wide array of topics, from sausage making and curing, to lye soap making and "chitlins" (the latter, I quickly discovered, I did not like). There were of course samples to accompany all of this, of which I believe I am still recovering from.


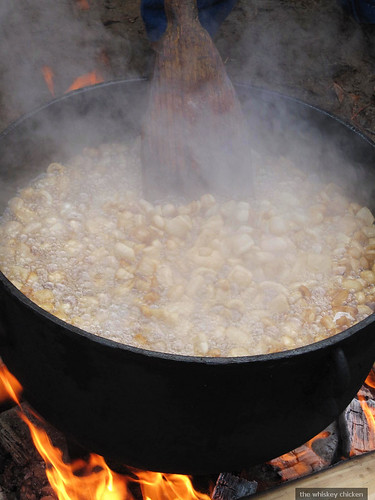
Frying pork skins
Mmm...pork skins


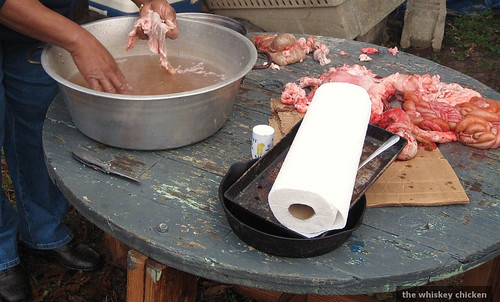
Making chitlins
Making chitterlings....um, yum?


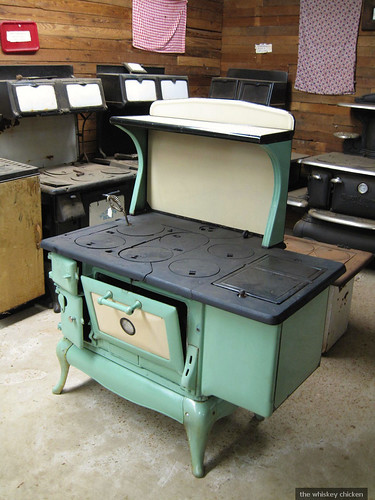
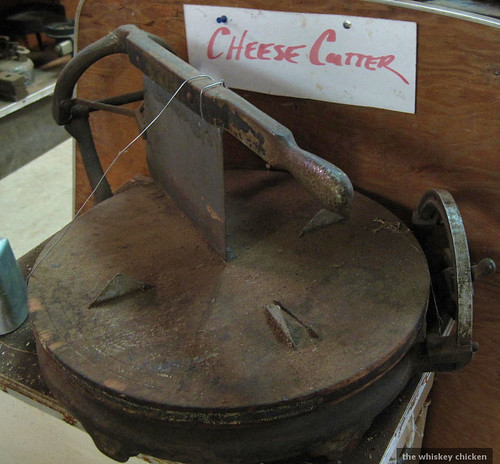
   After all of the intense pork fat snacking, the day was rounded out with yet a second hog killin', followed by 25 lbs. or so of freshly made sausage to take home. During all of this, one could have easily gotten lost in the wide array of fascinating equipment and knick knacks laying about had it not been so blasted cold. Among them was this gem...


Vintage stove
I need this


and naturally my favorite...


Vintage cheese cutter


I can't help but think that this event fits into the year-long theme of CharcutePalooza perfectly. Even though the Old Fashioned Hog Killin' of 2011 has come and gone, certainly see to it that you attend next year's if you are in the vicinity. Who knows, maybe next spring a couple of piglets will find their way onto my property!

Wednesday, February 2, 2011

CharcutePalooza: The roast, the roll, the risotto

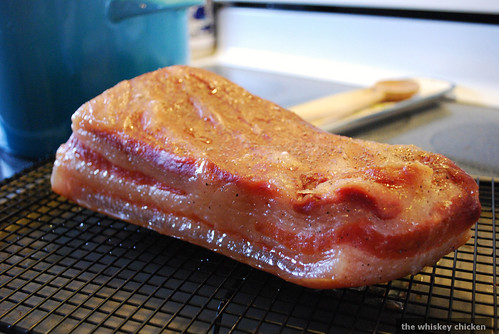
Homemade Bacon
Bacon!


   After what felt like forever, but was really only about one week, the bacon is ready! After its' chill in the refrigerator, into the oven it went. Unfortunately, it did not see the smoker this time. The weather in Georgia is a very peculiar thing. Last weekend it was 70 degrees, I was lounging on a patio in flip flops and sipping a margarita. Today, freezing cold and rainy. So the oven would have to suffice. After a 2 1/2 hour slow roast, it was done. Nothing to it. I am going to chill it before I slice it and fry it, but I did steal a small chunk from the side, which was divine. Salty, sweet, and tons of flavor. I cut the rind off and saved it for future beans, soups, and the such.


Bacon Rind
Use rind for superior flavoring


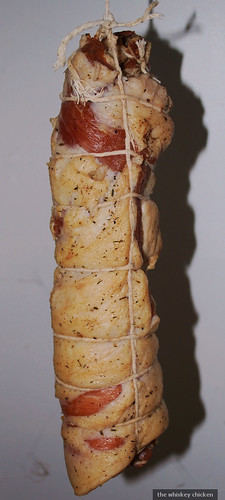
   Project Pancetta on the other hand, was quite the pain in the ass learning experience. After its' chilly cure, it needed to be rolled up tight and tied with twine. Sounded easy enough. Maybe it was the long day at work, or possibly the lack of wine, but rolling a firm cured piece of slippery meat as tightly as possible was maddening. It took many attempts just to get the damn thing rolled, and just as many to tie it even somewhat respectably (yes, I am still completely terrible at trussing, but improving). It did not seem to matter how long I made that piece of twine, it was just never quite long enough. But after a lengthy and tiring battle, the pork caved, I won.


Pancetta
You guessed it, into the coat closet


   Yet another creepy piece of meat hanging silently in the closet. This one kind of resembles a person's arm, or maybe shin? It will need about 2 weeks to finish curing before it is ready. I have no idea what I am going to do with all of this meat!
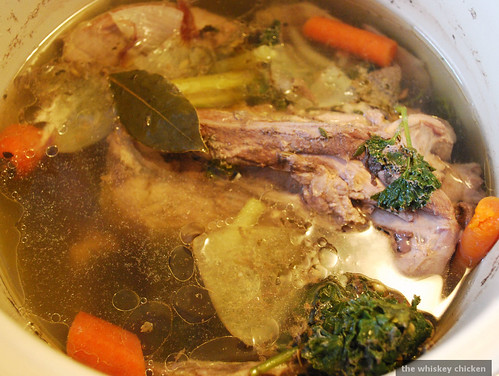
   While the bacon was roasting in the oven, I thought I would take a moment to make a duck stock. I had the carcass from the prosciutto hanging out in the freezer, and I also had some leftover duck prosciutto, so naturally I should make risotto. If you haven't made your own stock before, I highly recommend that you try it. You can use either a raw or cooked carcass, be it chicken or duck. I do very little measuring when I make stock, I tend to instead just toss whatever I have in hand into the pot.


Duck Stock

Ingredients

1 carcass, stripped of meat
4 carrots, roughly chopped
1/2 onion, cut into quarters
4 cloves garlic, smashed
2 scallions, cut in 1/2
4 stalks celery, roughly chopped
4 sprigs thyme
1 bunch parsley
2 bay leaves
1 tsp salt
1/2 tsp pepper
water to cover

Cover pot and bring to a boil. Reduce heat and simmer for 3 hours. Strain, and that's it. You can chill it overnight and skim the fat off the top, but I never have the time or patience for that.


Duck Stock


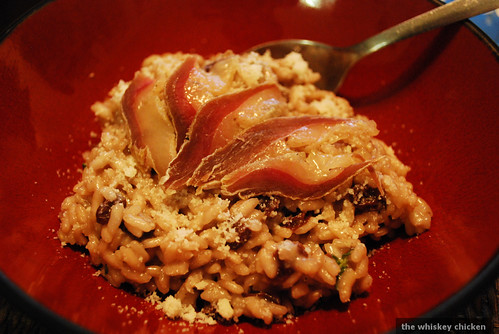
  After the stock is made, you have the perfect opportunity to make risotto. Since the stock is already hot, there is not need to go to the trouble of heating it up. I used the duck prosciutto from the first CharcutePalooza challenge to bring the dish together. This is a great recipe for a cold damp night, but can be improvised for any season.


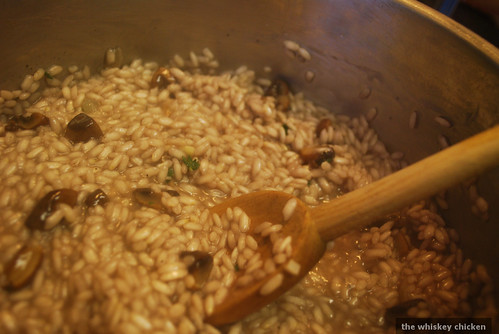
Risotto in Action


Duck Risotto with Mushrooms & Spiced Raisins

Ingredients

2 T butter
2 T onion, minced
6 mushrooms, chopped
2 cloves garlic, minced
3 sprigs thyme, stripped
1 3/4 c Arborio rice
1/3 c red wine (heated)
7 cups of hot duck stock (can substitute with chicken, beef, or mushroom stock)
*handful of spiced raisins
1 T butter
2 T half & half (optional)
Pecorino Romano to taste
Duck Prosciutto to garnish

Melt butter in a large saucepan and add onions and mushrooms. Saute until tender.
Add rice and garlic, cook for 1 minute.
Add wine and stir until absorbed.
Add 1/2 c of stock and stir until absorbed.
Continue adding 1/2 c of stock at a time until rice is thick and al dente (about 20 min.)
Add raisins, remaining butter, half & half, and cheese.
Stir and cover for 3 min.
Spoon into individual bowls, top with more Pecorino Romano, and garnish with thin slices of duck prosciutto.

*Spiced Raisins

Heat a handful of raisins in a small bowl with brandy, allspice, and orange peel. Let steep for 20 min.


Duck Risotto

Monday, January 24, 2011

CharcutePalooza: The Salt Cure


Fresh Pork Belly
A gorgeous local farm-raised pork belly


   At last! My pink salt has arrived! Now I can move onto more pressing matters, like curing! And blogging! The CharcutePalooza challenge for the month of February is salt curing. While sodium in general has gotten quite a bad rap in the health world, salt is an incredibly valuable mineral our bodies cannot do without. I realize that many of you are concerned about nitrites and pink salt. Nitrites, however, naturally occur in many fresh vegetables (hence why celery juice is used in "uncured" lunch meats). I personally do not consume large amounts of nitrite cured meats anyway, and do not worry myself over it, but that's just me. You should do your own research.
   I feel it is truly a crying shame that more people do not cure their own bacon. If I had known how easy the process was, I would have done it ages ago. My hopes are that I can possibly persuade you to try it for yourself. All it involves is some really nice pork belly, some salt, pink salt (although you can do without it), and whatever flavorings you so choose. Bacon is traditionally smoked, but you can skip this step as well.
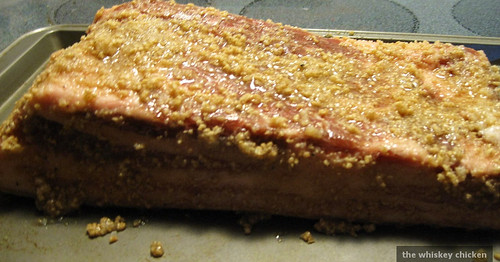
   I prefer sweet bacon, so after acquiring a beautiful pork belly, I slathered it in a mixture of salts, maple syrup, maple sugar, and black pepper.


Soon to be Bacon
Basking in all its' maple glory


   From there, it was into a Ziploc bag to be stored in the refrigerator to cure for about 7 days. It will need to be turned over every other day. Finally, it will be smoked. I am really looking forward to a good excuse to fire up our smoker in the middle of winter. Next up was Pancetta. Made much in the same way bacon is, pancetta is its' Italian cousin, just as tasty, only it fore goes the smoking and adds a little dry curing time.
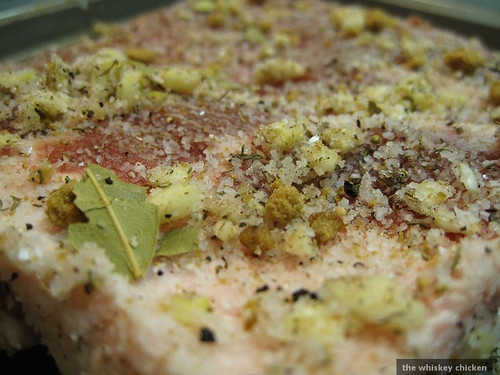
   I trimmed another pork belly until it was nice and square. For its' rub I used salt, brown sugar, pepper, bay leaves, nutmeg, mustard seed, thyme, and fresh garlic. It was hard not to start gnawing on it right then and there, it smelled that good.


Uncured Pancetta


   Like the bacon, it will also spend 7 or so days in a bag in the refrigerator. But instead of meeting a smoker/oven, it will be rolled, tied, and hung to dry in the same coat closet that the duck prosciutto hung out in. Yay, more creepy meat in the closet! It will take a few weeks to finish, but will be oh so worth it.
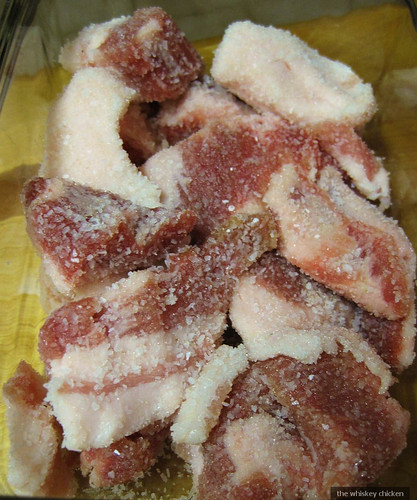
   After trimming the second belly, I was left with a small heap of meat and fat leftovers. According to Mr. Ruhlman, an excellent way to put those scraps to use (waste nothing!) is to make Salt Pork out of them. I have actually never used salt pork (which is exactly what is sounds like), but it can be used to flavor any number of dishes. Chili, stews, beans, tomato sauces, soups, and risottos can all benefit from a small hunk of salt pork. And it can be kept in the freezer for seemingly forever, so why not?!


Soon to be Salt Pork
Salty & Porky


   Since finally getting my hands on Charcuterie, I have been reading over all of the chapters and getting a good sense of what Michael Ruhlman is all about, at least when it comes to meat. I find it very exciting that someone is so passionate about supporting the art of meat curing. With so much negative hype about salt and fat, most people won't even look at a slice of salami, let alone put it in their mouths. What most people fail to realize is that the real concerns are the quality of the foods we eat, and the hidden evils that lurk in them. Preservatives, additives, flavoring agents...those words you can't pronounce on the label, those are what you should be worried about. Salt and fat have been around as long as we have, and always will be. So here is to salt and fat!

Long live charcuterie!

Sunday, January 16, 2011

CharcutePalooza: Duck Prosciutto, Part Deux


Duck Prosciutto
Duck Prosciutto


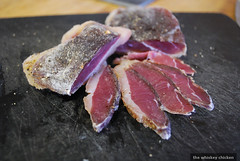
  Operation: Duck Prosciutto was a huge success! The meat chunks took only 4 days to cure in my coat closet, much quicker than expected. When unwrapped, everything looked good. No black skin, no mold, no fuzzies (other than what the cheesecloth left behind). The inside is a pretty prosciutto pink, lovely glisening fat. The flavor of pepper and garlic come through nicely. The salt is a bit much, but I think that is due mostly to the thickness of the cut, considering I don't have a proper meat slicer, or even a proper sharp knife for that matter (lazy).
   I am still both shocked and awed that my first home curing experiment went so incredibly well, and that it was so easy. The challenge for February: Pancetta & Bacon! I cannot wait to put a slab of pork belly on our smoker! More details to come.
   For now, the prosciutto will be enjoyed with a healthy amount of red wine and possibly a bite of cheese. I am going to freeze the rest for a nice flat bread pizza, or maybe a pasta dish starring peas and asparagus when Springtime rolls around. Just no Chianti and fava beans please.

Saturday, January 15, 2011

Chicken Butchering 2010


Rooster
Chicken what?

  
   As I mentioned previously, the "farm" saw 15 new chicks last summer. Of those chicks, 6 turned out to be boys. Now, I have nothing against roosters. Turns out they are quite useful. Mine is a fine and handsome example of what a rooster should be. He spends all of his time protecting his ladies, breaking up squabbles, finding tasty treats to share with the harem, and (most importantly) being sweet to me. However, 6 roosters is 5 too many. Roosters don't like to share, especially when it comes to hens. And they also have a thing for crowing, a lot.
   So come September, it was time to figure out what to do with them. I knew I wanted to keep one in the hopes of hatching out more cute and fluffy chicks, so the most gentle of the lot was spared. There is no place for mean roosters in this hen house. Selling them was a waste of time, heck it's hard to even give roosters away. So, since I happen to be a huge fan of all roasted, fried, and barbecued chicken, a good old-fashioned chicken harvest was in order. I am a big believer in respecting the animals I consume, hence one of many reasons why I always seek out non-industrial humanely raised meat. And if I do not feel comfortable with the thought of killing the animal I wish to consume, I do not consume that animal.
   There are a million different ways to kill a chicken, so I won't go into great detail about it here, although I do suggest using a killing cone, which is a very easy and less stressful (for you and the bird) way to get the job done. What I want to give you here is an idea of how easy it is to process your own meat in your own backyard. I unfortunately do not have step-by-step photos to guide you through it, so instead go here for a fantastic tutorial by Herrick Kimball, which is what I used.

Step 1: Pluck the Chicken

   For this I used your standard turkey fryer. Fill it with water and heat until hot, but not boiling. Take the chicken by the feet (already dead please) and plunge it into the hot water. Swish it up and down for a few seconds to ensure all of the feathers are getting saturated, then take it back out of the water so it doesn't begin to cook. Do this a few more times, and then test readiness by pulling on one of the large wing or tail feathers. If it slides out easily, it's good to go. Now if you do all of the plucking by hand, it will take awhile, but it is very easy. I was amazed at how easily the feathers just slide right out. If they don't, you need to scald some more. You can also buy/make a plucker, but I recommend doing it by hand the first time for the experience. It took me roughly an hour and a half with the help of a friend to finish plucking 5 roosters.

Step 2: Remove the Feet and Head

   After you finish plucking, give the chicken a good rinse, and grab a sharp boning knife or kitchen shears (the shears were my best friend during all of this). For the feet, start the cut in between the joint right above where the yellow stops.
   For the head, slice directly under the head into the neck and through the esophagus and trachea. You can save both of these to make stock with, or as a weird treat for the dogs!

Step 3: Loosen the Crop

  The crop of a chicken is a little sac that holds all of the food the chicken has eaten before it is carried into the gullet to be ground up. Depending on when the chicken last ate, the crop will vary in size. To find it, loosen some of the skin around the neck and peel it down close to the breast. Get under the skin and feel for a small fleshy sac. It will be tight against the skin and the breast. Carefully peel it away from the skin, but you do not have to remove it, it will come out with the rest of the guts later. Yum!

Step 4: Remove the Neck

   Pull away the excess skin from the neck. Hold the neck firmly, and make several cuts into the very base of the neck. Slowly twist the neck until it pops off. See, I told you this would be easy.

Step 5: Remove the Oil Gland

   Flip the chicken over so it is resting on its' stomach. There is a little oil gland right on the top of its' tail. It is common to slice this off, as it supposedly taints the taste of the meat when cooking. To do this, start slicing right above the gland (it looks like a little lump on the tail) and slice under it. It is yellow in color, so if you see any yellow left, just keeping slicing until you remove it all.

Step 6: Open 'Er Up!

   Flip the chicken back over onto its' back. Make a very small slice right above the vent (er, where the bird takes care of "business"). Be careful not to cut too deep as not to puncture any organs and make a mess. Use your fingers to tear the hole open large enough to fit your hand inside.

Step 7: Remove the Viscera (Guts!)

   Woo! Here is the fun part! No really, it is! Take your hand and slowly plunge it into the hole you just made. Keep your hand high up against the breastbone. When you reach the top, lightly grasp all of the squishy goodness and sloooowly pull. Make sure to do it gingerly so you don't go breaking the gall bladder. Keep pulling until all of the junk is on the outside of the cavity, but still connected to the vent. Cut the skin around the vent to free everything from the bird. You will probably have to go back in and feel for the lungs, which are tight against the ribcage on either side of the backbone. Honestly, I was not sure if I had removed them or not.

   This is the only picture I have from the big day.
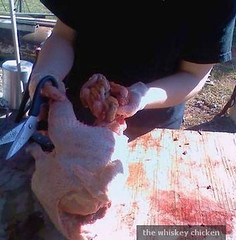
Chicken Harvest
Guts are fun!

   From here you can pick through the pile of fun to save delicious treats such as the liver, kidneys, heart, and gizzard, which I did. You can compost what you don't use. Now you want to give the chicken a good hose down, and chill it as quickly as possible. Keep the chicken in the refrigerator for 3 days before cooking or freezing. You want to make sure the rigor mortis has subsided so you don't bite into shoe leather at dinner time.
And that is all there is to it....chicken butchering made easy!
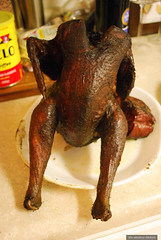


Rooster
Fresh from the smoker
 

Tuesday, January 11, 2011

CharcutePalooza: Duck Prosciutto

  
   Georgia doesn't see many snow days. So when it does, complete panic ensues. These last few days have been affectionately referred to as The Snowpocalypse around the city. But while everyone else was out hurriedly gathering up enough bread and milk to pave their driveways with (at least, that's what I think they do with it all), I was planning phase one of CharcutePalooza, first installment. Oh, and frolicking in the snow with this guy...

Frankie
SNOW DAY!!!

  
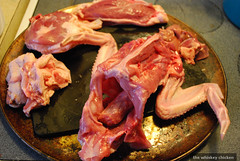
   First, I acquired a duck. The breasts by themselves would have been sufficient, but the whole beast was a much better deal for the money. I broke it down for several different uses.


Duck
Waste Nothing

  
   The skin and fat will be rendered down for cooking (mmm, duck fat fried potatoes), I slow roasted the legs/thighs for enchiladas, the liver will be reserved for pate, the breasts are of course for the curing experiment, and the remaining innards and carcass will be frozen and made into stock at a later date.
   As far as duck prosciutto goes, the process is very simple and straight forward. I totally encrusted the breasts in salt, let them rest in the refrigerator for 24 hours, and rinsed the salt off. At this point you can go straight into hanging them, or you can flavor them if you like.


Duck Breasts


   I decided to rub them with black pepper and garlic powder. I then soaked cheesecloth in brandy and (very badly) tied them up. In my haste to get this recipe started, I forgot to pick up more butchers twine. So I improvised with festive holiday raffia. I'm not sure if it makes the ugly job I did tying the things up better or worse.
   Finally, they were to be weighed and hung. Ideally, you want a somewhat cool and humid place to hang them, around 50 - 60 degrees and 60% humidity. I have a coat closet that roughly meets these standards, so that is where they hang today.


Prosciutto
Hello Clarice...

  
   And there they are. Sorry for the picture quality, the closet does not have lighting. I admit that it is a very strange feeling to have chunks of meat hanging in my coat closet. I am terribly excited about the results, but the process is a tad Hannibal Lectorish. Maybe one day I will have a proper meat suspension enclosure. The whole process should only take about a week if everything goes right, at which point I will post the results. Here's to not getting food poisoning!

Happy Curing!

Saturday, January 8, 2011

CharcutePalooza!

Charcuterie: shar.ku.ter.ee
1. Sausages, ham, pâtés, and other cooked, processed, or cured meat foods.
2. A delicatessen specializing in such foods.


   Do you DIY, eat copious amounts of cured meats, and like anything that has "Palooza" in the title (I know, me too!)? Then man oh man do I have a fun project for you! Welcome to CharcutePalooza (shar-koo-ta-pa-loo-za)! This year is officially The Year of Meat thanks to Mrs. Wheelbarrow and The Yummy Mummy, and everyone can get in on this fascinating year-long project.
   Based on the book Charcuterie: The Craft of Salting, Smoking, and Curing by Michael Ruhlman, each month will feature a new recipe to try out, photograph, and document. To join in the fun, send your name and blog info to Mrs. Wheelbarrow, who will add a new recipe on the 15th of each month. You will have one month to complete the challenge and blog about it if you so desire. Just send a link back to Mrs. Wheelbarrow and she will post your experience in a round-up of links on her site on the 30th of each month. You do not, of course, have to blog about or document anything if you choose not to (but why not?), you can simply follow along and try some great recipes you may not have tried otherwise. However, if you do join in this online community challenge, here are the rules according to Mrs. Wheelbarrow:

  • Let's celebrate the age-old talents and skills of charcuterie with contemporary takes on techniques, flavors, and presentation.
  • Let's agree to use humanely raised meat, sourced as close to home as possible.
  • Let's write about our experiences. Not just how the charuterie is made, but how we use it, serve it, flavor it.
  • Buy a copy of 'Charcuterie: The Craft of Salting, Smoking, and Curing' by Michael Rulhman.
  • Cook along as often as practical, there's no obligation.
  • Post about your experiences on the 15th of the month.
   The first recipe is already out, which I admittedly am a little late getting to. But I intend to start it at once, and blog the results anyway. What is the recipe you may be wondering? Why, Duck Prosciutto of course. Yes, you can make this at home. Even better is it really isn't that difficult. Can you imagine serving homemade duck prosciutto at your next dinner party? Yeah, that's like instant rock star status. I plan to start the recipe tomorrow, which will take 8 days to complete. Check back soon to read all about it. I ordered my copy of Charcuterie this morning, which has been on my Amazon wish list for quite some time. I highly advise you to do the same, in it you will find all of the recipes to come in this Year of Meat.

                                                              
psst...if you buy from this link, I get Amazon credits!


   For those of you who revel in the unusual and delicious, I can't think of a better commitment to make than this one. What a great feeling it is to realize that all of the foods we consume can be made easily by our own hands, with the ingredients and flavors we choose. Frying a piece of bacon you cured yourself  is a truly liberating experience. Now get to it!