 |
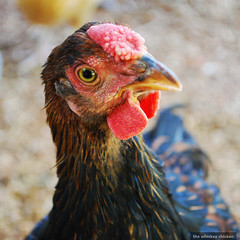
| Chicken what? |
As I mentioned previously, the "farm" saw 15 new chicks last summer. Of those chicks, 6 turned out to be boys. Now, I have nothing against roosters. Turns out they are quite useful. Mine is a fine and handsome example of what a rooster should be. He spends all of his time protecting his ladies, breaking up squabbles, finding tasty treats to share with the harem, and (most importantly) being sweet to me. However, 6 roosters is 5 too many. Roosters don't like to share, especially when it comes to hens. And they also have a thing for crowing, a lot.
So come September, it was time to figure out what to do with them. I knew I wanted to keep one in the hopes of hatching out more cute and fluffy chicks, so the most gentle of the lot was spared. There is no place for mean roosters in this hen house. Selling them was a waste of time, heck it's hard to even give roosters away. So, since I happen to be a huge fan of all roasted, fried, and barbecued chicken, a good old-fashioned chicken harvest was in order. I am a big believer in respecting the animals I consume, hence one of many reasons why I always seek out non-industrial humanely raised meat. And if I do not feel comfortable with the thought of killing the animal I wish to consume, I do not consume that animal.
There are a million different ways to kill a chicken, so I won't go into great detail about it here, although I do suggest using a killing cone, which is a very easy and less stressful (for you and the bird) way to get the job done. What I want to give you here is an idea of how easy it is to process your own meat in your own backyard. I unfortunately do not have step-by-step photos to guide you through it, so instead go here for a fantastic tutorial by Herrick Kimball, which is what I used.
Step 1: Pluck the Chicken
For this I used your standard turkey fryer. Fill it with water and heat until hot, but not boiling. Take the chicken by the feet (already dead please) and plunge it into the hot water. Swish it up and down for a few seconds to ensure all of the feathers are getting saturated, then take it back out of the water so it doesn't begin to cook. Do this a few more times, and then test readiness by pulling on one of the large wing or tail feathers. If it slides out easily, it's good to go. Now if you do all of the plucking by hand, it will take awhile, but it is very easy. I was amazed at how easily the feathers just slide right out. If they don't, you need to scald some more. You can also buy/make a plucker, but I recommend doing it by hand the first time for the experience. It took me roughly an hour and a half with the help of a friend to finish plucking 5 roosters.
Step 2: Remove the Feet and Head
After you finish plucking, give the chicken a good rinse, and grab a sharp boning knife or kitchen shears (the shears were my best friend during all of this). For the feet, start the cut in between the joint right above where the yellow stops.
For the head, slice directly under the head into the neck and through the esophagus and trachea. You can save both of these to make stock with, or as a weird treat for the dogs!
Step 3: Loosen the Crop
The crop of a chicken is a little sac that holds all of the food the chicken has eaten before it is carried into the gullet to be ground up. Depending on when the chicken last ate, the crop will vary in size. To find it, loosen some of the skin around the neck and peel it down close to the breast. Get under the skin and feel for a small fleshy sac. It will be tight against the skin and the breast. Carefully peel it away from the skin, but you do not have to remove it, it will come out with the rest of the guts later. Yum!
Step 4: Remove the Neck
Pull away the excess skin from the neck. Hold the neck firmly, and make several cuts into the very base of the neck. Slowly twist the neck until it pops off. See, I told you this would be easy.
Step 5: Remove the Oil Gland
Flip the chicken over so it is resting on its' stomach. There is a little oil gland right on the top of its' tail. It is common to slice this off, as it supposedly taints the taste of the meat when cooking. To do this, start slicing right above the gland (it looks like a little lump on the tail) and slice under it. It is yellow in color, so if you see any yellow left, just keeping slicing until you remove it all.
Step 6: Open 'Er Up!
Flip the chicken back over onto its' back. Make a very small slice right above the vent (er, where the bird takes care of "business"). Be careful not to cut too deep as not to puncture any organs and make a mess. Use your fingers to tear the hole open large enough to fit your hand inside.
Step 7: Remove the Viscera (Guts!)
Woo! Here is the fun part! No really, it is! Take your hand and slowly plunge it into the hole you just made. Keep your hand high up against the breastbone. When you reach the top, lightly grasp all of the squishy goodness and sloooowly pull. Make sure to do it gingerly so you don't go breaking the gall bladder. Keep pulling until all of the junk is on the outside of the cavity, but still connected to the vent. Cut the skin around the vent to free everything from the bird. You will probably have to go back in and feel for the lungs, which are tight against the ribcage on either side of the backbone. Honestly, I was not sure if I had removed them or not.
This is the only picture I have from the big day.
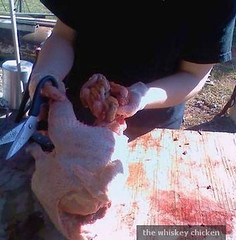 |
| Guts are fun! |
From here you can pick through the pile of fun to save delicious treats such as the liver, kidneys, heart, and gizzard, which I did. You can compost what you don't use. Now you want to give the chicken a good hose down, and chill it as quickly as possible. Keep the chicken in the refrigerator for 3 days before cooking or freezing. You want to make sure the rigor mortis has subsided so you don't bite into shoe leather at dinner time.
And that is all there is to it....chicken butchering made easy!
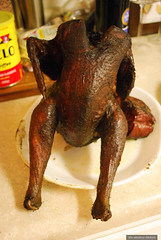 |
| Fresh from the smoker |
No comments:
Post a Comment