Tuesday, September 24, 2013

Get Your Southern Cheese Fest On!


  It's that time again! This year's Southern Artisan Cheese Festival in Nashville promises to be bigger and better than ever. In its 3rd year, cheese makers from 6 states (myself included) will be getting together to offer up the bounty of all things deliciously Southern and cheesy, and not your Grandma's pimiento dip either. And of course, there will be all the necessary tasty accouterments like wine, beer, meats, and various jarred treats.
  If you make it out this Saturday, that's Saturday September 28th from 2:30 to 6pm, please come and stop by the Sequatchie Cove Creamery booth and say hi! I look forward to seeing you there!


Southern Artisan Cheese Festival
2:30pm - 6pm
The Neuhoff Building
1319 Adams Street, Nashville (East Germantown), TN.

Friday, August 16, 2013

YOU should make Butter


image_5


  One of the many perks I have found about working on a dairy farm is access to all the raw milk and cream I can get my grubby hands on. While I have dabbled in many a various home dairying project, my lack of a constant supply of raw milk has made them sporadic at best until now. And of all the simple DIY milk endeavors one could undertake, cultured butter is probably the simplest. So would you believe that I have never tried it til now? I know...shocking.
  All you need for cultured butter is cream, yogurt (for culture), and either a food processor or stand mixer. You could make the task even simpler by nixing the culture in lieu of sweet cream butter, which is what most American palettes prefer. I love both, but have come to really appreciate the cultured (or European) kind for its added gut-friendly flora and slightly tangier taste, not to mention its longer (refrigerator) shelf life. Either a stand mixer or food processor will do, a mixer being a little messier.


image_4
fresh raw cream


  In either you over whip the cream until the solids break away from the liquid. With a little less than ten minutes of whipping, the cream will go through three stages: whipped cream, the cream "breaks" and some solids start to form and look like pebbles in a puddle, the solids clump together in a mass. After which, all that's needed is a little gentle kneading to persuade the remaining liquid (or buttermilk) to expel itself, and a little salt if you so desire.


image_1
washing & kneading


image_2
more kneading


Homemade Butter (with or without Culture)

ingredients


1 pint cream (raw or pasteurized)
3 Tablespoons plain whole milk yogurt (leave out for sweet cream style)
salt (optional)

If going the European route, slowly whisk yogurt into the cream and leave out at room temperature for 12 hours. (The cultures in the yogurt will immediately go to work and prevent the cream from spoiling).
Pour cream into your mixer or processor and set to Medium until slightly thickened, then to High.
Watch for the three stages: whipped cream, small solids, mass of solids. (You may want to drape a towel over your mixer to control the frenzy of milk droplets that will ensue).
Once a mass starts to form in the bowl (it will sound...sloshier), drain off your buttermilk (don't throw it out!).
Pour cold water over your butter and knead with your hands, rinsing and draining several times until the water is clear.
Transfer butter to a clean bowl or cutting board and continue kneading a little longer to get out any last remaining liquid.
This would be a good time to salt or add flavors if you want.

  Fresh unsalted butter will last about a week in the refrigerator, salted a little longer, and cultured for several weeks. And, of course, you can freeze it. And do I really need to mention that it will be spectacular and will transform your eggs corn popcorn toast everything to pure bliss? And what of the buttermilk you ask? If you cultured your butter, the resulting liquid will be thick, tangy, and extremely delicious. I drink it alone or with cornbread. But do experiment with its cooking properties, namely biscuits and pancakes. Or use it (if cultured) to culture other fun projects like creme fraiche or yogurt.
Whether you prefer your butter sweet and innocent or cultured and worldly, once you have tasted your own it will be very hard to go back.


image_3
edible Gold
 

Thursday, July 25, 2013

finding Home.


Summer
Summertime at the farm.


  Where, oh where, does the time go? It feels like the frantic buzz of Christmas season was five minutes ago. I turn my head and now we're closing in on Autumn. This morning I walked out into chilly air. Chilly! It makes me want to crawl inside a dark hole. But alas, there is no time to hibernate. A lot has been going on in the long absence of my blogging.
  For one, I am no longer a Georgia resident but now a Tennessean (er, well maybe not officially yet, shhh). While living on the farm is still a little ways off, we couldn't wait any longer. The mountains have been calling. So, we settled for the next best thing. Which is, of course, an apartment on the Tennessee River. So yeah, I am also now a river rat.


home sweet home
Not too shabby for apartment living, huh?


  And with this new dwelling comes a new trade. I once again have strayed from the cheese counter and am back in the dairy. You may recall some time ago I wrote about the fine cheese at Sequatchie Cove Creamery, well now I have the pleasure of making it. A lazy commute through the country to greet cows and vats of warm milk early each morning is a far (and welcomed) cry from the chaos of an urban jungle.


best sign ever


  I feel as though another huge step has been made toward becoming a full time farmer. Now that I'm here I can't fathom how it took me this long. I'm not sure what draws me to Tennessee, but I know it's the only place I ever want to be.


Hay
Home.


Wednesday, May 15, 2013

A Big Thanks (and a little shameless self-promotion)


 I would like to take a moment to thank the wonderful Lady and Feline Foodie over at the clever Marcella the Cheesemonger blog for featuring me in their latest installment of 2013:The Year of the Cheesemonger, their ongoing nod to cheese professionals. You can read the interview here.


image_1
Aren't lambs great?

Thursday, March 21, 2013

Chicken Liver Pate

image_1


  Liver. You either love it or you hate it. I happen to love it. Which is a most splendid thing in my book as offal meats (nasty bits) are so highly nutritious. Liver in particular is a super food of sorts. Nutrient dense and packed full of Vitamins A and B's, iron, copper, phosphorus, and selenium, it's a natural multi-vitamin. However, it is also packed full of intense flavor which has put off many a palette. I hope to help change that.
  While it may prove difficult to sit down to a pungent and slightly chewy liver steak, a smooth and simple pate is much more likely to find its way onto a cracker and into your mouth. If you haven't tried pate before, I implore you to do so at once. Country style pates are firmer and have more texture, whereas mousse pates (like this recipe) are creamy and mild.
  As with so many food things, making it at home is so much easier than one would think. And of course, you totally bypass all of the weird stabilizers, thickening agents, and refined stuff. And did I mention that pate is downright adorable in a little ramekin or canning jar? Instant cheese board hit. Give it a try, you can thank me later.


Chicken Liver Pate


Ingredients

1 lb. pastured chicken livers, washed, trimmed, and cut into large slices
ghee (clarified butter) for cooking with
1 large shallot, minced
1 tsp. fresh thyme
1 clove garlic, minced
3 T dry Sherry
3 T cold butter, cut into large chunks
3 T creme fraiche, sour cream, or fromage blanc
1 tsp salt
1/2 tsp pepper
a few dashes fresh nutmeg

Heat a tablespoon of ghee in a skillet and cook shallots, garlic, and thyme for a few minutes until softened.
Add Sherry and cook for 1 min.
Pour into food processor or Vitamix.
Heat a generous amount of ghee in same pan and add chicken livers, cooking until just cooked through.
Add livers to food processor and let cool slightly.
Add butter and blend until smooth.
Add creme fraiche and seasonings and blend until consistency of pudding.
Spoon out into small ramekins or jars and smooth out the tops.
Refrigerate for at least 2 hours.

At this point you can leave them as is, or if you would like a lovely garnish that will help preserve them longer, seal them up with butter.

Melt 3-4 tablespoons of ghee over low heat. Pour over each chilled mousse, garnishing with a sprig of thyme and cracked pepper. Refrigerate until butter is set.

You can serve alone as an awesome snack, with crackers, bread, pickles, or my personal favorite, lightly marinated cucumbers: Slice a cucumber and season with salt and pepper and a splash of white wine vinegar, keep cold until ready to serve. And as with cheese, it is best to bring your pate out of the refrigerator to warm up a little before serving, about 30 minutes. Did I mention that cheese and pate are BFF's? Well, they are.

dinner
See?


Monday, February 25, 2013

Earl Grey Tea & Lavender Honey Cheesecake


cheesecake


  As much as I love all cheese, I have never been much of a cheesecake fan. It could be that I rarely crave sweet things (I think I have a salt tooth, not a sweet tooth), or that cheesecake is usually so dense and weird, and always gets stuck right at the back of the throat. However, I was recently inspired by a tea room I visited in Savannah.
  As many of you know, I am currently on a grain-free refined sugar-free diet for health reasons, so adjusting recipes has been both a little challenging and fun. For the crust I used an *almond flour and pecan tart crust that I found on the blog Against All Grain. Truly great recipes there that have been invaluable to me in adjusting to this new lifestyle.
  The filling is steeped with Earl Grey tea, sweetened with honey, and lightened up with the addition of creme fraiche. I steeped fresh lavender in a mild honey for a few weeks, but you could certainly buy lavender honey, or skip it altogether and use clover or orange blossom honey instead.

  *A quick word about almond flour: While you can use the kind you find at the grocery store (usually Bob's Red Mill), I highly suggest ordering a blanched almond flour instead. It is ground without the skins, which creates a finer texture that is closer to "regular" flour. It can replace flour in virtually any recipe with a little tweaking and is packed full of protein. It does burn easily so a close eye must be kept on whatever you are baking. I love the Honeyville brand, which I buy in bulk and freeze, keeping just enough to use in the refrigerator.


Earl Grey Tea & Lavender Honey Cheesecake


Ingredients

crust: 3/4 cup pecans
          1 1/2 cups almond flour
          1/4 tsp salt
          1/4 tsp baking soda
          1/4 tsp cinnamon
          1/4 tsp nutmeg
          1/2 tsp vanilla
          3 T cold butter or coconut oil
          2 T honey
          1 egg

Preheat the oven to 350 degrees.
Grind pecans in food processor until a coarse meal forms.
Add remaining ingredients and pulse until dough forms, or cut in with pastry cutter.
Press dough into a 9" spring form pan.
Poke holes into crust all over with a fork and bake for 12 min.
Place in freezer for 20 minutes.

filling: 1 lb. cultured cream cheese (2 packages)
            16 oz. creme fraiche or good quality sour cream
            1/2 cup heavy cream or full fat coconut milk
            4 eggs
            1/2 a vanilla bean, split in half and scraped
            2/3 cup lavender honey
            2 T strongly brewed Earl Grey tea
            1/2 tsp salt
            2 Earl Grey tea bags

Heat cream to a boil, remove from heat, and steep with 2 tea bags for 10 minutes.
Meanwhile, beat cream cheese and creme fraiche until smooth.
Add remaining ingredients including cooled heavy cream.
Pour into prepared crust (I line the outside of my spring form pan with aluminum foil to help keep the water bath out.).
Place in a baking pan and fill baking pan halfway with hot water.
Bake for 1 1/2 hours, rotating halfway.
Bake until just barely set in the center and surface is lovely and lightly browned.
Let cool, then let chill in refrigerator overnight.


tea and honey cheesecake
Are you ready for Spring or what?!
          

Monday, February 11, 2013

Honey Whiskey Bacon


image_1


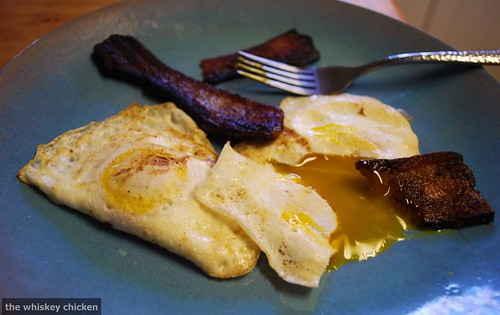
  As promised, I am sharing with you the results of my latest bacon. This is definitely my favorite batch so far. I always enjoy a sweet bacon, but this one has several layers of complexity with a nice smokey whiskey bite.
  This recipe is very simple and only takes about a week to complete. I smoked mine at the end, but you can always finish it off in the oven instead. If you choose the oven route, after drying in the refrigerator, roast it for 2 1/2 to 3 hours at 200 degrees.
  If you do smoke (your bacon that is) you can use any number of woods. I used Bourbon barrel wood chips for a one-two whiskey punch in the face, but hickory, mesquite, or peach would be really nice too.
  Now, I should mention that this recipe includes curing salt a.k.a. pink salt a.k.a. sodium nitrite salt (which is not the same thing as Himalayan sea salt). You can certainly skip this step as well, but your bacon won't be quite as..well...bacon-y. It will have a brownish hue and more of a pork roast flavor, which certainly isn't a bad thing.
  You can find oodles of information out there that is either for or against nitrites, so I won't bother getting into that. I do favor the articles here and here if you care to investigate.
   And lastly, this will make you a 5 pound batch, which sounds like a lot until you start eating it. You can of course freeze half, or just half the recipe.


Honey Whiskey Bacon


Ingredients

5 lbs. fresh pork belly
5 T kosher salt
1 tsp curing pink salt (optional)
1/2 c strong dark honey like Buckwheat
4 T whiskey, the cheaper the better
1 garlic clove, roughly chopped
1 tsp cracked black pepper
2 bay leaves, torn into small pieces
1 tsp juniper berries, crushed
1/2 tsp fresh nutmeg, grated

Combine salts, honey, whiskey, garlic, and spices in a small bowl.
Rub thouroughly over belly and put into a large freezer bag (can cut in two if too large).
Pour any remaining curing "sauce" into bag.
Lay flat in refrigerator and flip every other day (liquid will gather in bag, this is a good thing, just keep in contact with belly).
After 7 days, remove belly and wash under cold water.
Place onto a cooling rack that is on top of a baking sheet, place in refrigerator uncovered for 24 hours.
Smoke at 200-210 degrees for 2 1/2 - 3 hours.
If belly still has rind intact, slice off while still warm, save for flavoring in beans, greens, or chili.
Slice as desired and fry.
Repeat...and repeat...and repeat....


good morning